CADpass client secure connection (will be referred to as CADpass client or CADpass in this document) is a utility provided by CMC Microsystems that creates a secure connection between client PC’s, workstations, and computer sessions, and the CMC managed infrastructure.
This quick start guide provides instructions for installing Luceda IPKISS on a Windows system using CMC Microsystems’ CADpass to access shared licenses on the CMC License Management System (LMS).
Prerequisites
You must meet the following criteria before installing IPKISS:
- Students must register with CMC at https://account.cmc.ca/MyAccount/MyAccount.aspx
- Faculty supervisors can subscribe through the CMC subscription page at https://www.cmc.ca/subscriptions/
- You must have administrator rights for the computer on which you are installing this software
- You must have a unique login name (LINUX or Windows) that does not contain a blank space. The following are examples of unacceptable login names: admin or administrator, root, super, sysadmin, user, owner, student, guest, temp, and system.
System Requirements
- Recommend Hardware: At least 2 GB of RAM is recommended, 10 GB of disk space
- Software Requirements: OS requirements are 64-bit version of Windows 11, 10, 8.1
Setting up CADpass client for Use with IPKISS
CADpass client is a CMC Microsystems’ license access client and is used by subscribers across Canada to connect to our secure license server(s).
- Follow the instructions in the quick start guide to download and install CADpass client.
- Start CADpass client and then log in using your CMC Microsystems Username and Password.
- When the CAD access window appears, double-click Luceda.
A red checkmark appears next to the entry, as shown in Figure 1. Leave this checked while you are using the software.
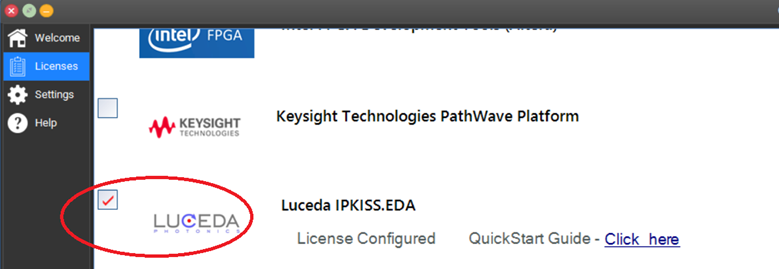
Figure 1: The Luceda Tool Selection in CADpass client
Obtaining the Software
Download the Luceda IPKISS software from: https://account.cmc.ca/WhatWeOffer/Products/CMC-00200-05574.aspx
The downloaded package is ipkiss-installer-3.9.1.exe.
This guide uses version IPKISS.3.9.1. Other versions of the software will have a similar installation process.
Installing the Software
To install the tool:
It is suggested to uninstall the old version of the IPKISS tool from your system (using Windows Add or remove programs to uninstall it) before installing the new version.
- Double-click the file ipkiss-installer-3.9.1.exe.
- Accept the License Agreement and click Next, as shown in Figure 2.
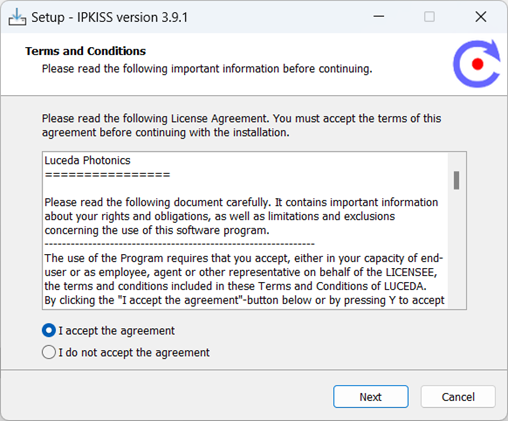
Figure 2: Accept the License Agreement
The screen Select Destination Location is displayed.
- Select the installation location and click Next, as shown in Figure 3.
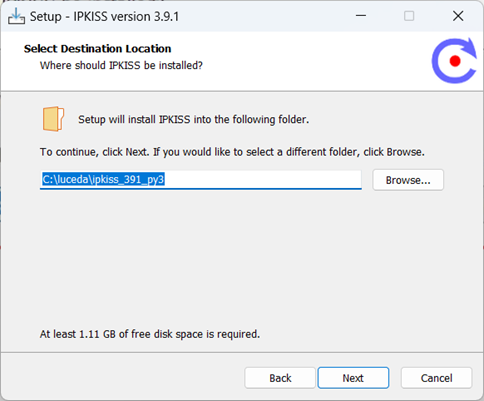
Figure 3: Confirm or Select the Installation Location
- Click the checkbox to Create a desktop icon, and click Next, as shown in Figure 4.
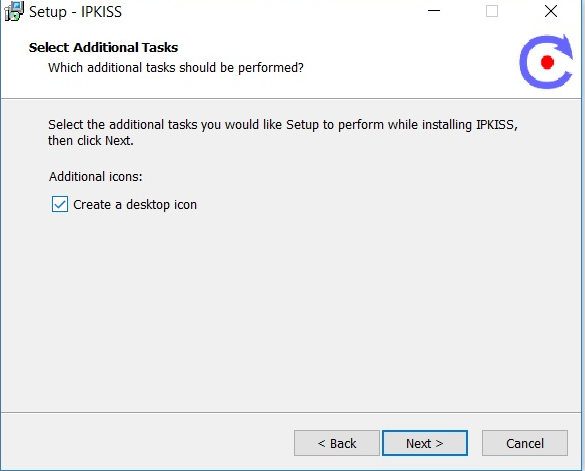
Figure 4: Create a Desktop Icon
The screen Ready to Install is displayed.
- Click Install, as shown in Figure 5.
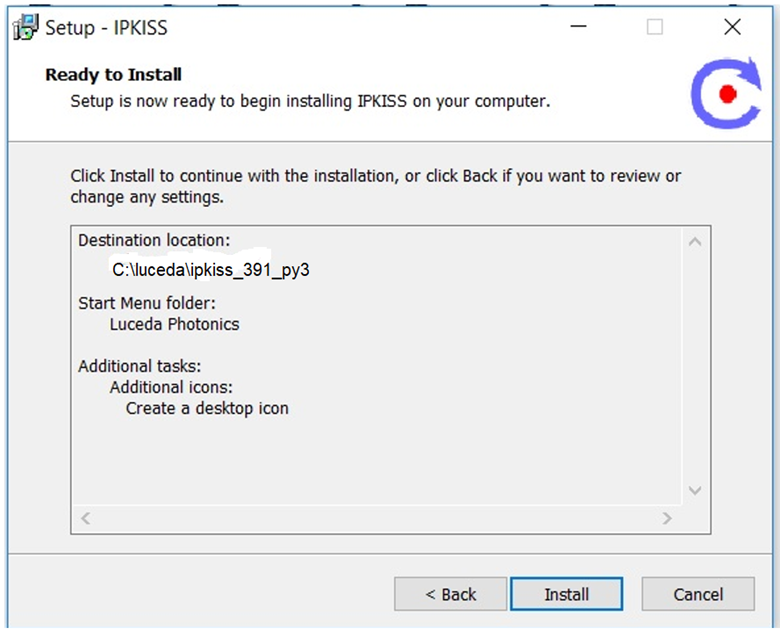
Figure 5: Start the Installation
The IPKISS tool begins to install.
During the installation, a pop-up window displays the progress of the packages being installed, as shown in Figure 6.
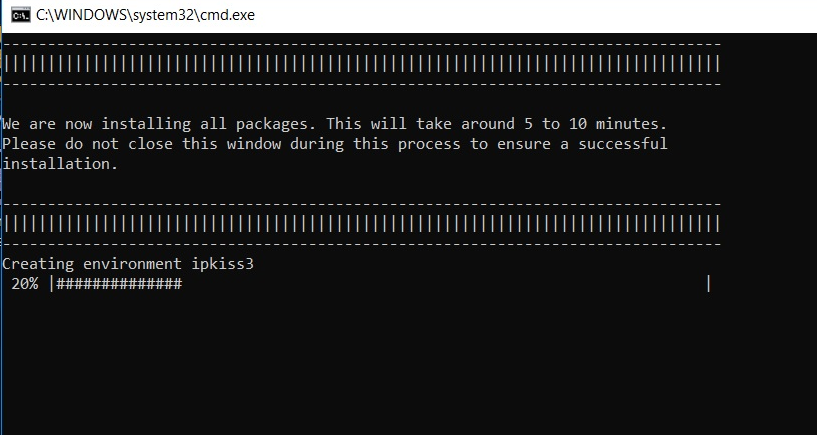
Figure 6: Installing the Packages
- After the installation is complete, you can click the checkbox to Start Luceda control center and then click Finish, as shown in Figure 7.
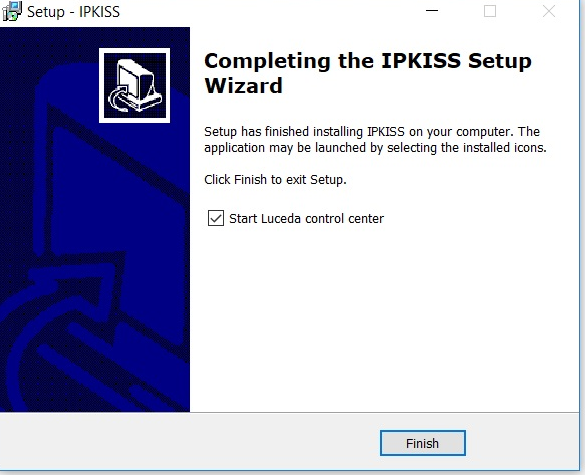
Figure 7: Finish the Installation
The Luceda Control Center 3.9.1 should be running, as shown in Figure 8.
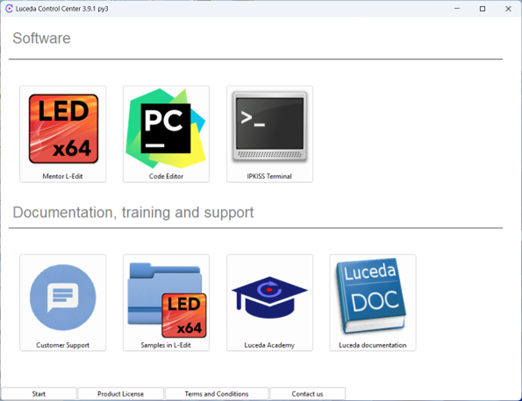
Figure 8: Luceda Control Center 3.9.1
Note: If you do not select Start Luceda control center, as shown in Figure 8, then, if you created the desktop icon, you can click the Luceda tool desktop icon to invoke the tool after the installation is finished.
- In Luceda Control Center 3.9.1, click the tab Product Licence, located at the bottom of the window.
- Wait or click Refresh until the Valid column displays License OK in the top 5 fields, as shown in Figure 9.
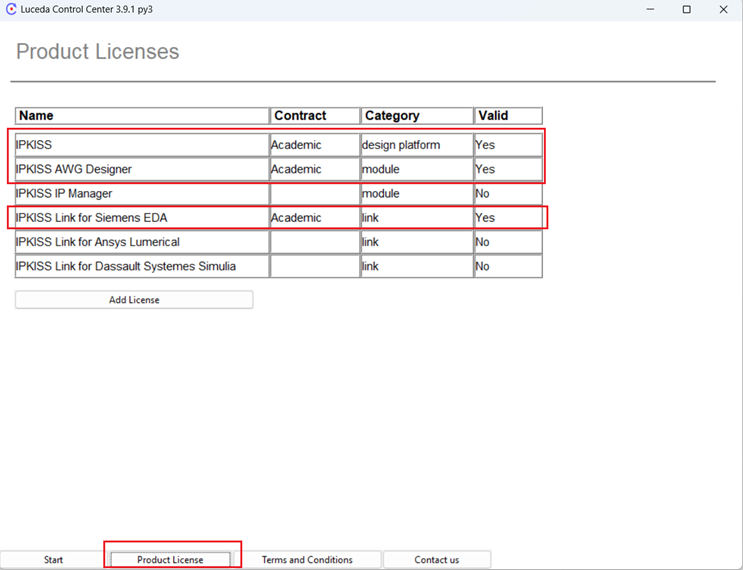
Figure 9: Check Valid License
- In Luceda Control Center 3.9.1, click the tab Start located at the bottom of the window, as shown in Figure 8.
You can now start using the tool.
